Dyson Installer
Requirements
To install Dyson you need:
- 64-bit PC (amd64 aka x86_64),
- CD-ROM drive,
- 1.5 GiB of RAM,
- 6 GiB of free space on a MBR partitioned disk,
- network access to one of the Dyson mirrors (maybe your own).
You can also use virtual machines such as VirtualBox or QEMU.
Installing on QEMU
This is tested on Debian amd64 with QEMU version 1.1.2.
$ qemu-img create -f qcow2 dyson.qcow2 10G
$ qemu-system-x86_64 -hda dyson.qcow2 -m 1500 -cdrom dyson-netinst-2013-05-05-1506.iso
Getting the installer
Download the latest ISO image of install CD from http://dl.osdyson.ru/iso/.
Network access from the install CD
When booting from CD the startup script tries to bring networking up via DHCP.
If no DHCP servers available you have to configure network manually. To configure network manually switch to the console (press the F2 key), and use commands dladm, ipadm, route, also remember to update the /etc/resolv.conf file with vim or nano. See appropriate man pages, e. i. man ipadm, for detail.
Example:
- Print available network interfaces:
# dladm show-phys
LINK         MEDIA                STATE      SPEED  DUPLEX    DEVICE
e1000g0      Ethernet             unknown    1000   full      e1000g0
- Bring the "e1000g0" interface up (aka plumb):
# ipadm create-if e1000g0
A few seconds later, if you typedladm show-physagain, you will see that the state of the interface is changed from "unknown" to "up" or "down" (cable connected or not). If the state is "down" there is no reason to go with this interface until you connect the cable. - Assign an address to the interface. You may want to try DHCP again:
# ipadm create-addr -T dhcp e1000g0/dhcp
or give it a static address, e. g.:# ipadm create-addr -T static -a 192.168.2.45/24 e1000g0/static
- If using static IP, set up the default gateway (e. g. 192.168.2.1), otherwise dhcpagent will do it for you:
route -n add default -gateway 192.168.2.1
You can view routing table withnetstat:netstat -nr
- Setup name servers in
/etc/resolv.conf
Getting closed source drivers
Dyson does not include closed source drivers, such as mpt (see https://www.illumos.org/issues/3).
There are instruction by Jason Upton on how to get closed source drivers and use them during installation:
http://lists.osdyson.org/pipermail/dyson-devel/2013-April/000041.html
Post-install configuration
Getting updates
Since the installer is a network installer it uses "testing" repository to install base system. "testing" repository is known to work. After installation you may want to switch to "unstable".
Dual boot with GRUB2 on Debian
Given that Dyson is installed on the primary partition N of the first drive, add following lines to /etc/grub.d/40_custom and run grub-mkconfig -o /boot/grub/grub.cfg to updated GRUB2 menu.
menuentry "Dyson" {
set root=(hd0,N) # change N to the partition number (1 to 4)
chainloader +1
}
With this configuration Debian's GRUB2 will show the "Dyson" item in its menu and will run Dyson's GRUB if you choose that item ("chain loading").
Obviously, Dyson's GRUB should be installed into a partition, not into MBR (Debian's GRUB2 holds MBR).
Installation process
This section describes an optimistic installation process on a clean virtual machine.
LiveCD GRUB menu:
LiveCD is booting:
The installer's start screen: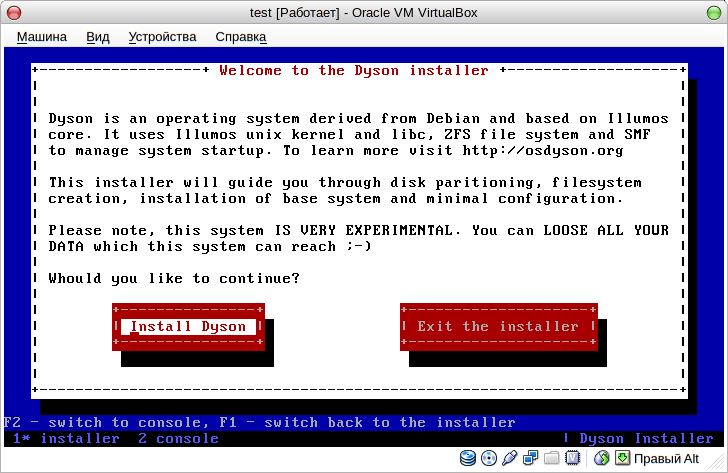
The console. You can switch to the console (press F2) and execute any commands as root. To switch back to the installer press F1:
First of all, the installer searches for hard disks and ZFS pools. The installer can install Dyson to existing ZFS pool, or can create a new one.
For new ZFS pool you need a disk with one Solaris partition:
cfdisk from util-linux is used for editing partitions :
Solaris partition has id = 0xbf:
After creating a Solaris partirion remember to choose "Write" in cfdisk menu, then - "Quit":
Now you are ready to install Dyson:
The installer will format Solaris partition (with a single slice) and create ZFS root pool and minimal ZFS filesystems (including swap, /home and /):
Choosing how big the installed system will be:
Then you will be asked to choose a Dyson mirror:
Next, installation of a base system begins (using debootstrap):
If you choose basic or desktop profile, additional packages will be installed (via apt-get):
Then - enter a hostname (aka nodename):
And finally, enter root password:
If installing more than just a minimal system, you will be asked to create a regular user:
Then the installer will create boot archive:
And populate initial SMF repository:
Dyson uses GRUB 1 for booting (aka GRUB legacy). It can be installed on master boot record (MBR) or on a partitions (which you've choosen for root ZFS pool). Note that is that partition is a logical partition, GRUB will be forcedly installed on MBR. If you are installing on an existing ZFS pool (e. g. created by OpenIndiana), you may want to just update GRUB menu, or completely skip GRUB configuration. In any case an example configuration is saved in /boot/grub/menu.lst on root filesystem.
Then, you are done:
Eject CD and reboot:
That was just the beginning...